Tuesday, March 22, 2016

Elephant Bird API - Loading JSON data Using JsonLoader into Apache Pig

Elephant Bird API - Loading JSON data Using JsonLoader into Apache Pig

Here, I will explain how to use the Elephant Bird API for loading JSON data into Apache Pig. 


Suppose we are having following Blog Data into JSON format.

Blog JSON:

"Blog" : "IMU008390900000", 
"BlogType" : "Big Data Blog"
"AuthorDisplayName" : "Iqubal Mustafa Kaki", 
"Title" : "Elephant Bird API - Loading JSON data into Apache Pig", 
"AuthorEmailId" : " iqubal.kaki@gmail.com", 
}

Steps for loading JSON Data into Apache Pig


Here we need to register below jars

grunt> REGISTER '/home/training/Desktop/ElephantBird/elephant-bird-core-4.13.jar'
grunt> REGISTER '/home/training/Desktop/ElephantBird/elephant-bird-pig-4.13.jar'
grunt> REGISTER '/home/training/Desktop/ElephantBird/elephant-bird-hadoop-compat-4.5.jar'
grunt> REGISTER '/home/training/Desktop/ElephantBird/json-simple-1.1.jar'

Load JSON into Pig Using JsonLoader

gruntrecords = load '/user/training/Blog.json' using com.twitter.elephantbird.pig.load.JsonLoader('Blog:chararray,BlogType:chararray,AuthorDisplayName:chararray,Title:chararray,AuthorEmailId:chararray');

Verify the same

grunt> dump records;

Output will be

Successfully stored 1 records (203 bytes) in: "hdfs://localhost/tmp/temp-726203488/tmp-918944215"

Counters:
Total records written : 1
Total bytes written : 203
Spillable Memory Manager spill count : 0
Total bags proactively spilled: 0
Total records proactively spilled: 0

Job DAG:
job_201603232110_0003

2016-03-23 21:48:54,132 [main] INFO  org.apache.pig.backend.hadoop.executionengine.mapReduceLayer.MapReduceLauncher - Success!
2016-03-23 21:48:54,192 [main] INFO  org.apache.hadoop.mapreduce.lib.input.FileInputFormat - Total input paths to process : 1
2016-03-23 21:48:54,192 [main] INFO  org.apache.pig.backend.hadoop.executionengine.util.MapRedUtil - Total input paths to process : 1
([AuthorEmailId#iqubal.kaki@gmail.com,AuthorDisplayName#Iqubal Mustafa Kaki,BlogType#Big Data Blog,Title#Elephant Bird API Loading JSON data into Apache Pig,Blog#IMU008390900000])


Reference https://pig.apache.org/docs/r0.11.1/func.html#jsonloadstore

Hope you have enjoyed the article.
Author : Iqubal Mustafa Kaki, Technical Specialist

Want to connect with me
If you want to connect with me, please connect through my email  iqubal.kaki@gmail.com

Friday, February 19, 2016

Java API for Invoking Oozie Workflows

Java API for Invoking Oozie Workflows

Java Client API for the integration of Apache Oozie and Java applications. Here I will explain about Java API for interacting/invoking Apache Oozie Jobs.  


There are two approaches for writing Java code for invoking Oozie jobs.

- Oozie Client Java API
- Local Oozie Client Java API

You can download below explained project and related configuration files from the link ExecuteOozieJobUsingJavaAPI  or from GitHub download link


Oozie Client Java API

This approach will explain how to submit an Oozie job using the Java Client API.

Below code will elaborate the step for writing Apache Oozie Client.

import org.apache.oozie.client.OozieClient;
import org.apache.oozie.client.WorkflowJob;
.
import java.util.Properties;
.
    ...
.
    // get a OozieClient for the Oozie
    OozieClient wc = new OozieClient("http://kingsolomon:8080/oozie");
.
    // create a workflow job configuration and set the workflow application path
    Properties conf = wc.createConfiguration();
    conf.setProperty(OozieClient.APP_PATH, "hdfs://kingsolomon:9000/myapp");
.
    // setting workflow parameters
    conf.setProperty("jobTracker", "kingsolomon:9001");
    conf.setProperty("inputDir", "/myapp/inputdir");
    conf.setProperty("outputDir", "/myapp/outputdir");
    ...
.
    // submit and start the workflow job
    String jobId = wc.run(conf);
    System.out.println("Workflow job submitted");
.
    // wait until the workflow job finishes printing the status every 10 seconds
    while (wc.getJobInfo(jobId).getStatus() == Workflow.Status.RUNNING) {
        System.out.println("Workflow job running ...");
        Thread.sleep(10 * 1000);
    }
.
    // print the final status of the workflow job
    System.out.println("Workflow job completed ...");
    System.out.println(wf.getJobInfo(jobId));
    ...


Sample Java program to call workflow


Suppose your project ExecuteOozieJobUsingJavaAPI path  is  /user/hadoopadmin/Desktop/ExecuteOozieJobUsingJavaAPI. Also workflow.xml and other files are in the project folder. You can get the these files and Java code from above source code project folder link. Put all these file & folder inside HDFS, so these are available for Map Reduce jobs internally using by Apache Hive. 

For reference please go through the workflow.xml file which is in the project folder.

Here we need to set all properties which we have used in the workflow.xml file

Note : Ensure to replace configuration highlighted properties with your environment specific configuration.

import java.util.Properties;

import org.apache.oozie.client.OozieClient;
import org.apache.oozie.client.WorkflowJob;

public class ExecuteOozieScheduler {

public static void main(String[] args) {
    OozieClient wc = new OozieClient("http://kingsolomon:11000/oozie");

    Properties conf = wc.createConfiguration();

   conf.setProperty(OozieClient.APP_PATH, 
 "hdfs://kingsolomon:9000/user/hadoopadmin/Desktop/ExecuteOozieJobUsingJavaAPI/workflow.xml");
    conf.setProperty("jobTracker", "kingsolomon:9001");
    conf.setProperty("nameNode", "hdfs://kingsolomon:9000");
    conf.setProperty("queueName", "default");
    conf.setProperty("dbScripts", 
    "hdfs://kingsolomon:9000/user/hadoopadmin/Desktop/ExecuteOozieJobUsingJavaAPI");
    conf.setProperty("rootFolder", 
    "hdfs://kingsolomon:9000/user/hadoopadmin/Desktop/ExecuteOozieJobUsingJavaAPI");
    
   // HDFS directories (multiple directories can be separated by a comma) that contain JARs
    conf.setProperty("oozie.libpath", "hdfs://kingsolomon:9000/user/oozie/share/lib");
    conf.setProperty("oozie.use.system.libpath", "true");
    conf.setProperty("oozie.wf.rerun.failnodes", "true");

    try {
        String jobId = wc.run(conf);
        System.out.println("Workflow job, " + jobId + " submitted");

        while (wc.getJobInfo(jobId).getStatus() == WorkflowJob.Status.RUNNING) {
            System.out.println("Workflow job running ...");
            Thread.sleep(10 * 1000);
        }
        System.out.println("Workflow job completed ...");
        System.out.println(wc.getJobInfo(jobId));
    } catch (Exception r) {
        System.out.println("Errors " + r.getLocalizedMessage());
    }
}
}


Local Oozie Client Java API

Oozie provides an embedded Oozie implementation, LocalOozie , which is useful for development, debugging and testing of workflow applications within the convenience of an IDE.

The code snipped below shows the usage of the LocalOozie class. All the interaction with Oozie is done using Oozie OozieClient Java API, as shown in the previous section.

The examples bundled with Oozie include the complete and running class, LocalOozie Example from where this snipped was taken.

Below code will elaborate the step for writing Local Oozie Client.

import org.apache.oozie.local.LocalOozie;
import org.apache.oozie.client.OozieClient;
import org.apache.oozie.client.WorkflowJob;
.
import java.util.Properties;
.
    ...
    // start local Oozie
    LocalOozie.start();
.
    // get a OozieClient for local Oozie
    OozieClient wc = LocalOozie.getClient();
.
    // create a workflow job configuration and set the workflow application path
    Properties conf = wc.createConfiguration();
    conf.setProperty(OozieClient.APP_PATH, 
"kingsolomon:9000/myapp");
.
    // setting workflow parameters
    conf.setProperty("jobTracker", "kingsolomon:9001");
    conf.setProperty("inputDir", "/myapp/inputdir");
    conf.setProperty("outputDir", "/myapp/outputdir");
    ...
.
    // submit and start the workflow job
    String jobId = wc.run(conf);
    System.out.println("Workflow job submitted");
.
    // wait until the workflow job finishes printing the status every 10 seconds
    while (wc.getJobInfo(jobId).getStatus() == Workflow.Status.RUNNING) {
        System.out.println("Workflow job running ...");
        Thread.sleep(10 * 1000);
    }
.
    // print the final status o the workflow job
    System.out.println("Workflow job completed ...");
    System.out.println(wf.getJobInfo(jobId));
.
    // stop local Oozie
    LocalOozie.stop();
    ...


Sample Java program to call LocalOozie workflow


Here we need to set all properties which we have used in the workflow.xml file

Note : Ensure to replace configuration highlighted properties with your environment specific configuration.

import java.util.Properties;

import org.apache.oozie.local.LocalOozie;
import org.apache.oozie.client.OozieClient;
import org.apache.oozie.client.WorkflowJob;

public class ExecuteLocalOozieScheduler {
public static void main(String[] args) throws Exception {
    LocalOozie.start();
// get a OozieClient for local Oozie
   OozieClient wc = LocalOozie.getClient();

   Properties conf = wc.createConfiguration();

   conf.setProperty(OozieClient.APP_PATH, 
 "hdfs://kingsolomon:9000/user/hadoopadmin/Desktop/ExecuteOozieJobUsingJavaAPI/workflow.xml");
   conf.setProperty("jobTracker", "kingsolomon:9001");
   conf.setProperty("nameNode", "hdfs://kingsolomon:9000");
   conf.setProperty("queueName", "default");
   conf.setProperty("dbScripts", "/user/hadoopadmin/Desktop/ExecuteOozieJobUsingJavaAPI");
   conf.setProperty("rootFolder", "/user/hadoopadmin/Desktop/ExecuteOozieJobUsingJavaAPI");
   // HDFS directories (multiple directories can be separated by a comma) that contain JARs
   conf.setProperty("oozie.libpath", "hdfs://kingsolomon:9000/user/oozie/share/lib");
   conf.setProperty("oozie.use.system.libpath", "true");
   conf.setProperty("oozie.wf.rerun.failnodes", "true");

   try {
       String jobId = wc.run(conf);
       System.out.println("Workflow job, " + jobId + " submitted");

       while (wc.getJobInfo(jobId).getStatus() == WorkflowJob.Status.RUNNING) {
           System.out.println("Workflow job running ...");
           Thread.sleep(10 * 1000);
       }
       System.out.println("Workflow job completed ...");
       System.out.println(wc.getJobInfo(jobId));
   } catch (Exception r) {
       System.out.println("Errors " + r.getLocalizedMessage());
   }
}

}


Sample Output
.....
Workflow job running ...
Workflow job completed ...

Workflow id[......] status[SUCCEEDED]


Hope you have enjoyed the article.
Author : Iqubal Mustafa Kaki, Technical Specialist

Want to connect with me
If you want to connect with me, please connect through my email  iqubal.kaki@gmail.com


Tuesday, February 16, 2016

Apache Oozie - Big Data Workflow Engine

Apache Oozie - Big Data Workflow Engine

As you know Hadoop is used for handling huge data set. Sometime one job may not be sufficient for doing all required task. Better you go more number of jobs and the get output of one job as input for other job. Finally when N number of job completed you will get the appropriate solution. Also there should be a co-ordination between these N numbers of jobs. Thus Oozie takes care the co-ordination between these job. Its co-ordinate these job and take output from job and passing this as input to another job. Thus you can say Oozie is a workflow scheduler engine which co-ordinate between N number of Job as defined in its configuration XML file. For running Oozie the BOOTSTRAP service should be available.


Here in the above diagram, there are three jobs A, B & C. The output of Job A is the input of Job B. Similarly the output of Job B is the input of Job C.

Thus, Anyone can define Apache Oozie as following. 

Oozie is a workflow scheduler system to manage Apache Hadoop jobs.
Oozie Workflow jobs are Directed Acyclical Graphs (DAG) of actions.
Oozie Coordinator jobs are recurrent Oozie Workflow jobs triggered by time (frequency) and data availabilty.
Oozie is integrated with the rest of the Hadoop stack supporting several types of Hadoop jobs out of the box (such as Java map-reduce, Streaming map-reduce, Pig, Hive, Sqoop and Distcp) as well as system specific jobs (such as Java programs and shell scripts).

Oozie is a scalable, reliable and extensible system.


                           Oozie in the Hadoop ecosystem

The backbone of Oozie configuration is workflow XML file. The workflow.xml file will have all configuration of N number of the jobs. Basically it is having two node. First one is control node and second one is action node. Control node has the job list and the sequence of the execution. Action nodes will have Job's action details. Thus one job will have one action tag for the same. There will be one control tag but N number of action tags that depends on the number of jobs you are performing.


Installation and Configuration

Oozie Installation on CentOS 6

We use official CDH repository from cloudera’s site to install CDH4. Go to official CDH download section and download CDH4 (i.e. 4.6) version or you can also use following wget command to download the repository and install it.

For OS 32 Bit

$ wget http://archive.cloudera.com/cdh4/one-click-install/redhat/6/i386/cloudera-cdh-4-0.i386.rpm

$ yum --nogpgcheck localinstall cloudera-cdh-4-0.i386.rpm

For OS 64 Bit

$ wget http://archive.cloudera.com/cdh4/one-click-install/redhat/6/x86_64/cloudera-cdh-4-0.x86_64.rpm

$ yum --nogpgcheck localinstall cloudera-cdh-4-0.x86_64.rpm


After adding CDH repository, execute below commands to install Oozie onto the machine

[root@kingsolomon ~]# yum install oozie

However above command should cover Oozie client installation. If not the execute below command to install Oozie client.

[root@kingsolomon ~]# yum install oozie-client

Oozie has been installed onto the machine. Now we will configure the Oozie onto the machine.

Oozie Configuration on CentOS 6
As Oozie does not directly interact with Hadoop, we need to do the configuration accordingly.
Note : Please configure all the settings when Oozie is not up and running.
Oozie has ‘Derby‘ as default built in DB however, I would recommend to use MySQL.

[root@kingsolomon ~]$ mysql -u root -p
Enter password:
Welcome to the MySQL monitor.  Commands end with ; or \g.
Your MySQL connection id is 3
Server version: 5.5.38 MySQL Community Server (GPL)

Copyright (c) 2000, 2014, Oracle and/or its affiliates. All rights reserved.
Oracle is a registered trademark of Oracle Corporation and/or its
affiliates. Other names may be trademarks of their respective
owners.

Type 'help;' or '\h' for help. Type '\c' to clear the current input statement.

mysql> create database oozie;
Query OK, 1 row affected (0.00 sec)

mysql> grant all privileges on oozie.* to 'oozie'@'localhost' identified by 'oozie';
Query OK, 0 rows affected (0.00 sec)

mysql> grant all privileges on oozie.* to 'oozie'@'%' identified by 'oozie';
Query OK, 0 rows affected (0.00 sec)

mysql> exit
Bye

Now Configure MySQL related configuration into oozie-site.xml file

[root@kingsolomon ~]# cd /etc/oozie/conf
[root@kingsolomon ~]# vi oozie-site.xml

Add the following properties.
<property>
          <name>oozie.service.JPAService.jdbc.driver</name>
          <value>com.mysql.jdbc.Driver</value>
</property>
<property>
          <name>oozie.service.JPAService.jdbc.url</name>
          <value>jdbc:mysql://master:3306/oozie</value>
</property>
<property>
          <name>oozie.service.JPAService.jdbc.username</name>
          <value>root</value>
</property>
<property>
          <name>oozie.service.JPAService.jdbc.password</name>
          <value>root</value>
</property>

Download and add the MySQL JDBC connectivity driver JAR to Oozie lib directory.

[root@kingsolomon Downloads]# cp mysql-connector-java-5.1.31-bin.jar /var/lib/oozie/

Create Oozie database schema by executing below commands

[root@kingsolomon ~]#  sudo -u oozie /usr/lib/oozie/bin/ooziedb.sh create -run 

Sample Output will be
 setting OOZIE_CONFIG=/etc/oozie/conf
 setting OOZIE_DATA=/var/lib/oozie
 setting OOZIE_LOG=/var/log/oozie
 setting OOZIE_CATALINA_HOME=/usr/lib/bigtop-tomcat
 setting CATALINA_TMPDIR=/var/lib/oozie
 setting CATALINA_PID=/var/run/oozie/oozie.pid
 setting CATALINA_BASE=/usr/lib/oozie/oozie-server-0.20
 setting CATALINA_OPTS=-Xmx1024m
 setting OOZIE_HTTPS_PORT=11443
 setting OOZIE_HTTPS_KEYSTORE_PASS=password
 ...... 
Validate DB Connection
DONE
Check DB schema does not exist
DONE
Check OOZIE_SYS table does not exist
DONE
Create SQL schema
DONE
Create OOZIE_SYS table
DONE
Set MySQL MEDIUMTEXT flag
DONE

Oozie DB has been created for Oozie version '3.3.2-cdh4.7.1'

The SQL commands have been written to: /tmp/ooziedb-3060871175627729254.sql


Download ExtJS lib then extract the contents of the file to /var/lib/oozie/ on the same host as the Oozie Server.

[root@kingsolomon Downloads]# unzip ext-2.2.zip
[root@kingsolomon Downloads]#  mv ext-2.2 /var/lib/oozie/

Make sure MySQL service is up and running before executing Oozie start command.

[root@kingsolomon Desktop]# service mysqld start
Starting mysqld:                                           [  OK  ]

Start Oozie server by executing below commands. 

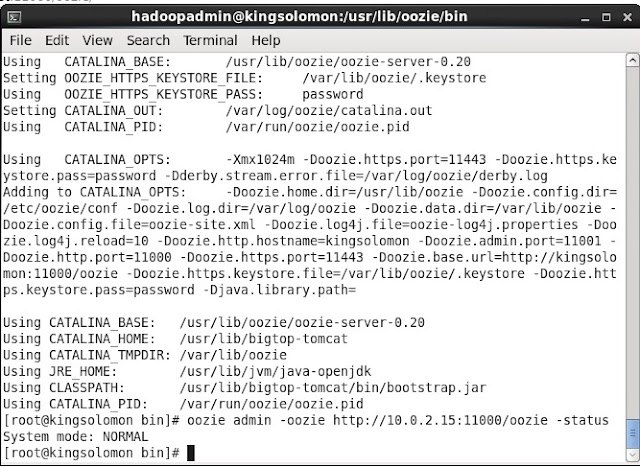
[root@kingsolomon Desktop]# service oozie start

Sample Output will be
 Setting OOZIE_HOME:          /usr/lib/oozie
 Sourcing:                    /usr/lib/oozie/bin/oozie-env.sh
 setting OOZIE_CONFIG=/etc/oozie/conf
 setting OOZIE_DATA=/var/lib/oozie
 setting OOZIE_LOG=/var/log/oozie
 setting OOZIE_CATALINA_HOME=/usr/lib/bigtop-tomcat
 setting CATALINA_TMPDIR=/var/lib/oozie
 setting CATALINA_PID=/var/run/oozie/oozie.pid
 setting CATALINA_BASE=/usr/lib/oozie/oozie-server-0.20
 setting CATALINA_OPTS=-Xmx1024m
 setting OOZIE_HTTPS_PORT=11443
 setting OOZIE_HTTPS_KEYSTORE_PASS=password
 ....
Using CATALINA_BASE:   /usr/lib/oozie/oozie-server-0.20
Using CATALINA_HOME:   /usr/lib/bigtop-tomcat
Using CATALINA_TMPDIR: /var/lib/oozie
Using JRE_HOME:        /usr/lib/jvm/java-openjdk
Using CLASSPATH:       /usr/lib/bigtop-tomcat/bin/bootstrap.jar
Using CATALINA_PID:    /var/run/oozie/oozie.pid


Verify the Oozie Server Status

[root@kingsolomon Desktop]# service oozie status

running

[root@kingsolomon Desktop]# oozie admin -oozie http://kingsolomon:11000/oozie -status

System mode: NORMAL


Open Oozie Web Console from the browser using http://kingsolomin:11000/oozie link


Hope you have enjoyed the article.

Author : Iqubal Mustafa Kaki, Technical Specialist

Want to connect with me
If you want to connect with me, please connect through my email - 
iqubal.kaki@gmail.com